Showing posts with label Crafts. Show all posts
Showing posts with label Crafts. Show all posts
February 11, 2017
September 11, 2014
DIY Gold and Silver Magnets
Hey ya'll!!
So, this is the easiest little project ever...DIY gold and silver alphabet magnets.
They're quick, they're cheap, they're really cute, and if you're anything like me, they'll make you act like you just learned how to spell and you're really excited about it.
For like a week.
And I totally got this idea here. So, Michael deserves all the credit for these. I am but a mere magnet copier who just wants to share her joy with the people.
December 11, 2013
20+ DIY Christmas Ornament Wreath Ideas
You guys. Never have I ever been so amazed and surprised by something. After sharing this year's ornament wreath on the blog, tons of you emailed me photos of wreaths you had created inspired by that post.
In just two weeks, I had an inbox bursting at the seams with pictures of ornament wreaths.
Imagine my inbox as Chris Farley in a little coat. And don't EVEN act like you don't know and love Tommy Boy.
In just two weeks, I had an inbox bursting at the seams with pictures of ornament wreaths.
Imagine my inbox as Chris Farley in a little coat. And don't EVEN act like you don't know and love Tommy Boy.
December 6, 2013
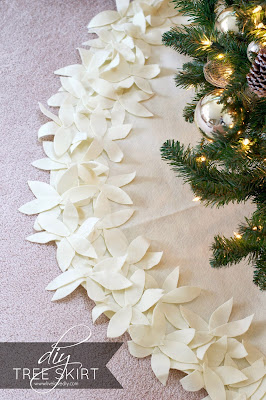
How To Make a NO-SEW Christmas Tree Skirt
You KNOW how I feel about sewing.
November 14, 2013
How To Make A Christmas Ornament Wreath
The ornament wreath I created last year was one of my all time favorite projects.
It seemed to be one of yours, too, and so many of you sent me amazing pictures of wreaths you created using the tutorial.
Unfortunately, Tootie and Cheese felt differently and Ornament Wreath Version 1.0 didn't survive the winter.
November 12, 2013
How To Make a DIY Christmas Leaf Wreath (with Rub n Buff)
So, here's a quick and easy tutorial for how to make your own diy leaf wreath using some faux leaves, rub n buff, and a styrofoam wreath form. Enjoy!
I used a styrofoam wreath form, hot glue, a few fake leaf and flower stems, gold buttons, ribbon, and silver Rub n Buff (affiliate link).
I removed the leaves from the stem and applied Rub n Buff to each leaf.
Then I glued more leaves to the front of the wreath.
Next, I hot glued small gold leaf stems and small green leaf stems and over the top of those, I attached white orchid petals. This covered any styrofoam still showing on the wreath form.
I used red velvet ribbon to hang the wreath, and attached little gold buttons. You can add anything you want.
The world is your oyster, girl.
To cover the styrofoam on the inside of the wreath, I attached some white ribbon.
Here's the final product. Not too shabby for a few bucks and an hour of my life.
That's all for today! Thanks for stopping by, y'all.
For more holiday posts, you can check out the following:
'Til next time!!


-->
November 7, 2013
DIY Snowflake Books
Jesse and I just got back from a mini vacation visiting his sweet parents this week. It was a much needed few days of relaxation and I returned home in total Christmas-mode. I don't even know how it happened. I swear I was waving to trick or treaters on my way out of town. But resistance is futile. My Christmas wheels have been set in motion.
October 9, 2013
DIY Gold Leaf Art
Even though my silver leaf desk still haunts me in my dreams almost a month later, I decided to try gold leafing one more time. I'm not easily deterred, and was determined to conquer this elusive little leaf creature. This time, I thought it would be best to choose something smaller than a desk, and opted for art.
Good news. Turns out gold leafing isn't all that hard.
As long as you gold leaf something the size of a pepperoni.
Good news. Turns out gold leafing isn't all that hard.
As long as you gold leaf something the size of a pepperoni.
September 26, 2013
How To Make Pillows With Glue (and A Living Room Sneak Peek)
I've been boycotting our living room since May 2012. If you ever saw this post, you know how many ridiculous mistakes I have made with this room, and they continued long after that post. Letmetellyouwhat.
So, it's been 1.5 years, and I've finally decided to work on this room again. I still have several big projects to finish, but I thought it might be fun to share a sneak peek and do some pillow-talking.
So, it's been 1.5 years, and I've finally decided to work on this room again. I still have several big projects to finish, but I thought it might be fun to share a sneak peek and do some pillow-talking.
September 12, 2013
How To Make A Bow In 5 Easy Steps
I love gift wrapping. I always have. Growing up, I remember asking my mom to let me wrap the gifts for every occasion. For me, it's fun to have an excuse to make something and be able to give it to someone I love.
Plus, it's a great skill to have as a wife, as Jesse's method of gift wrap for family and friends usually involves a grocery bag. Although, I kinda think that's just as cute. :)
Plus, it's a great skill to have as a wife, as Jesse's method of gift wrap for family and friends usually involves a grocery bag. Although, I kinda think that's just as cute. :)
August 13, 2013
DIY Mod Podge Hangers
Before today, I had never decoupaged anything in my life. I bought a small thing of Mod Podge last December, but pretty much just stared at it longingly for the past 8 months, waiting for it to speak to me and tell me what to do. Because I had no idea.
And then I did my $50 closet makeover and my little jar of Mod Podge spoke up and said 'Pssst. Hey girl. It's time.'
And then I did my $50 closet makeover and my little jar of Mod Podge spoke up and said 'Pssst. Hey girl. It's time.'
June 4, 2013
DIY No-Sew Greek Key Ribbon Pillows
For the past month, I've been working on refreshing our master bedroom. I still have a few more projects I have to finish before I can show you all of the changes. In the meantime, I thought I would give you a little sneak peek and show you the Greek Key ribbon pillow I made for the bed.
June 3, 2013
DIY Bead Magnets
Today I had a great little idea while looking at one of my favorite bracelets that had recently broken...
I could make it into some magnets!
I immediately ran to the craft store and found some little magnets, and after a few minutes at home with a glue gun, these little fellas were created.
April 29, 2013
How To Make A Pillow With Glue
You guys know I have never been able to master my sewing machine. And not for lack of trying. (Okay, fine, I didn't try very hard and pretty much gave up at the first sign of difficulty.) But, since I know I'm not alone in this struggle, I decided to share how I make most of my pillows...without a sewing machine.
It's a beautiful thing.
A little while ago, I came across some fabric glue called Unique Stitch and decided to give it a try, figuring nothing could be worse than fumbling around with a bobbin for an hour.
And as it turns out, this stuff is great. I've tried fabric glue before, but it never delivered and usually left me wanting my $5 back. This stuff is different. It totally delivered. You can even wash your pillow covers after using this stuff on them, and it still holds strong. It takes a little longer to dry than some of the other fabric glues, but the end result is much better. You can find Unique Stitch at most craft stores or online here (amazon affiliate link).
I ended up making a bunch of different pillows, some for the guest bedroom I'll share next week, and some for the living room. I'm pretty happy with how they turned out.
Cost me about $3 a pillow.
One million dollars saved.
So, here's a quick pillow tutorial.
You need fabric. I was able to get 2 pillows out of 1 yard of fabric, so buy accordingly.
You also need scissors and of course, the fabric glue.
To make an envelope pillow, you need to cut 3 pieces of fabric. I cut one 20x20 inch piece and two 20x15 inch pieces.
The two 20x15 inch panels combine to make the backside of the pillow, overlapping slightly in the center, with an opening in the center (where the green arrows are) that the pillow goes into.
Here's a diagram to show you how it works.
To assemble your pillow, place the two 20x15 panels on top of the 20x20, matching up the numbers in the diagram.
The black arrows show you where to glue the fabric to attach the panels to one another.
I chose to run a strip of glue along the edge on the two 20x15 panels where the green arrows are and fold the fabric over so that they look finished and so that I didn't have any raw edges of my fabric showing. Also, since you are assembling this pillow inside out, lay the fabric with the print facing inward.
When the pillow is assembled, the two 20x15 panels end up where the pillow opens in the back, slightly overlapping. This is what the back of your pillow will look like.
(It functions just like a standard sham pillowcase, and you can remove it to wash it.)
Once you've glued your pillow cover together, allow it to dry overnight. Once it's dry, you can turn your pillow cover right-side-out and stuff your pillow in the opening. I like to use down alternative pillow inserts because they fill the covers out really nicely.
Want more? For more budget decorating ideas, check out my top 50 here.
March 22, 2013
DIY Flower Wreath
Today I'm sharing my little floral wreath I made using items from the dollar store. I absolutely love the way it turned out, and it's the perfect little wreath for spring.
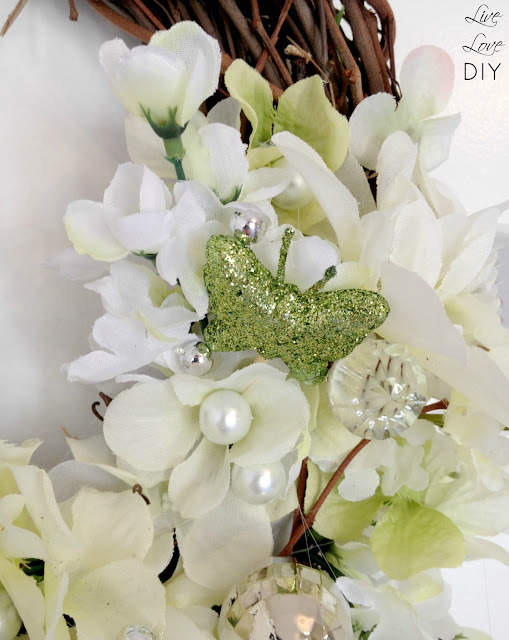
It's probably no surprise that my wreath is coated in pearls, glitter, giant crystals, disco balls, and butterflies.
I saw this amazing wreath from Horchow back in December when I was brainstorming ideas for Christmas wreaths (and ultimately ended up making this). I just couldn't stop thinking about it.
Horchow's White Floral Wreath (seen below) is absolutely gorgeous. I remember seeing it and thinking hmmmmm...I could make that.
And I did.
But my own sassy version.
Must. Have. Sass.
All of the supplies came from dollar stores and craft stores.
It took a little time to make, but was super easy to do.
Here are the supplies I used to make my wreath.
1. Basic wood wreath ($3 at Joann's)
2. 4 stems of assorted fake flowers ($1 each at Dollar Tree = $4)
3. 1 strand of glass pearls ($1 at Joanns)
4. Green glitter butterflies ($1 at Dollar Tree)
5. Giant Crystals ($1 bag of 'table scatter' from Dollar Tree)
6. Glue sticks and glue gun (on hand = free!)
7. Mini disco balls from my Christmas ornament stash (free!)
8. Small silver beads leftover from Christmas garland strand (free!)
9. White ribbon (50 YARDS scored for $1 last year here)
TOTAL = $10
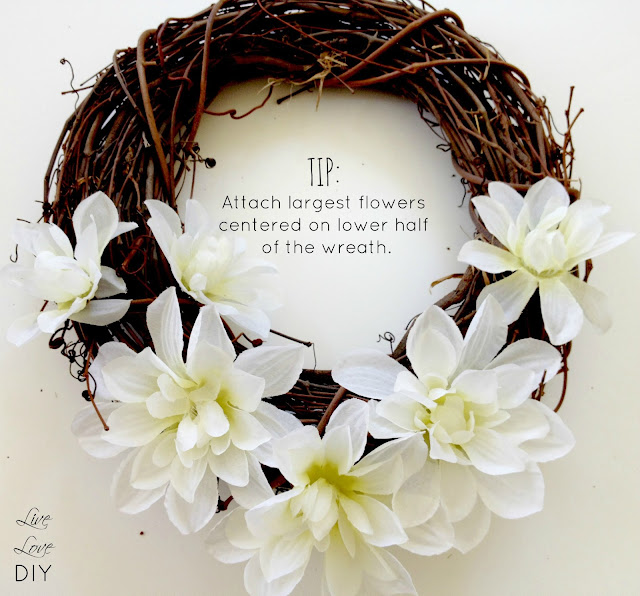
To make this wreath, start with a basic wreath form. Since the top will be exposed, I chose a simple wooden stick wreath. Using the largest flowers, center the flower heads among the lower half of the wreath.
Once your large flowers are in place, fill in the remaining bottom half of the wreath with the smaller flowers. Try using several different sizes and shapes of smaller flowers to give the wreath a little texture.
Now, it's time to add a little bling. I just randomly chose whatever I could find at the store/my house. I finally settled on pearls, giant crystals, mini-disco balls, small silver beads, and green-glittered-butterflies.
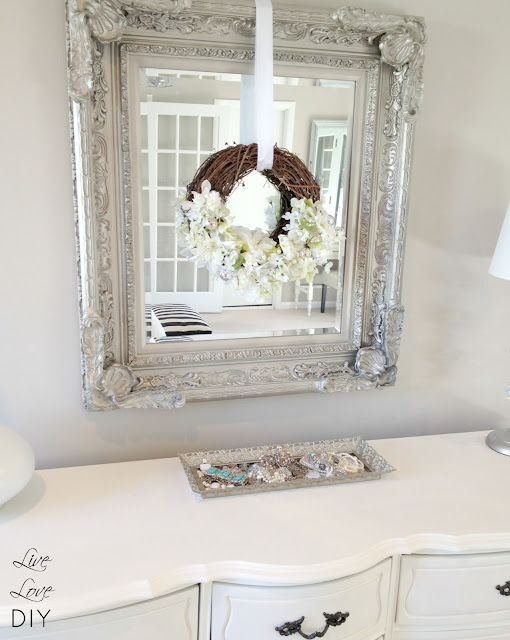
Once you've attached all of your bling with your hotglue, cut a long piece of ribbon and wrap it around the top of your wreath.
I attached the ribbon right to the wall with a single silver nailhead, right above my fantle.
Jesse opens and closes the front door like a Woolly Mammoth and I don't have a mantle over the fireplace.
So, the fantle it is.
And that's all, folks!
Thanks so much for stopping by!


-->
Subscribe to:
Posts (Atom)


.jpg)


.jpg)
.jpg)

.jpg)


.jpg)


