LiveLoveDIY home home my story house tour projects top 10 contact How To Make Gold Leaf Art faux stacked log fireplace tutorial DIY Abstract Wall Art diy ampersand thumbtack art 10 budget decorating tips LiveLoveDIY Image Map

July 19, 2012

Easy DIY Ideas for Updating Your Bathroom!

 I've spent the past two weeks updating our old, outdated master bathroom. I did it all myself, and with a budget of less than $100. I'm so excited to finally be able to share all the DIY details with you!


Easy DIY ideas for updating older bathrooms. So many great ideas including how to paint tile & grout, and how to frame in a mirror!


My way of working with a small budget is to focus on what I can change cheaply and make the best of what I have. I would love to upgrade to a fancy glass shower and gorgeous marble countertops, but that's just plain unrealistic for us right now. In the meantime, I wanted to at least upgrade the space by using a few inexpensive diy tricks I have up my sleeve, most of which require paint! Hopefully this will help give you some ideas & solutions for your own outdated bathrooms!

So, here is what the bathroom looks like today.

Easy DIY ideas for updating older bathrooms. So many great ideas including how to paint tile & grout, and how to frame in a mirror!

I decided I wanted our master bath to be a fresh, clean aqua blue. I decided upon Sherwin Williams Sea Salt, which is my absolute favorite color. 
I even used it in my closet!

Now, brace yourselves.
 Here is what the bathroom looked like 2 years ago when we moved in. 

Easy DIY ideas for updating older bathrooms. So many great ideas including how to paint tile & grout, and how to frame in a mirror! 

We had peachy-beige walls and orange, grainy cabinetry. 

Here's a side by side:

Easy DIY ideas for updating older bathrooms. So many great ideas including how to paint tile & grout, and how to frame in a mirror!


The very first thing I did in this bathroom was to paint the cabinetry and trim. It's an easy, affordable solution, and always helps to update an outdated space.
See my best trim painting tips here.

I also changed out the hardware on the vanity. I decided to switch it up a bit by putting round knobs on the drawers and vertical pulls on the doors. I love adding little personalized touches like that.

Easy DIY ideas for updating older bathrooms. So many great ideas including how to paint tile & grout, and how to frame in a mirror!

Luckily, the former owner had already installed gorgeous faucets and crisp white sinks, so those stayed. 

Easy DIY ideas for updating older bathrooms. So many great ideas including how to paint tile & grout, and how to frame in a mirror!

The tile countertops were painted white using the same product I used here. It's such an easy update, and way cheaper than replacing your countertops. 

Easy DIY ideas for updating older bathrooms. So many great ideas including how to paint tile & grout, and how to frame in a mirror!


See that soap pump and little canister? Both came from my favorite thrift store. I think they were about $2 each.

I also painted the grout on our floor tile. It was kinda dingy, and grout paint was an easy solution. Here's that part of the project halfway through. You can see where the restored white grout runs into the old brown grout.

Easy DIY ideas for updating older bathrooms. So many great ideas including how to paint tile & grout, and how to frame in a mirror!

Here's the grout completely done and looking clean and new!

Easy DIY ideas for updating older bathrooms. So many great ideas including how to paint tile & grout, and how to frame in a mirror!

You can see how I paint my grout here.


I also scored a cute floral shower curtain and bath mat at Marshall's.

Easy DIY ideas for updating older bathrooms. So many great ideas including how to paint tile & grout, and how to frame in a mirror!


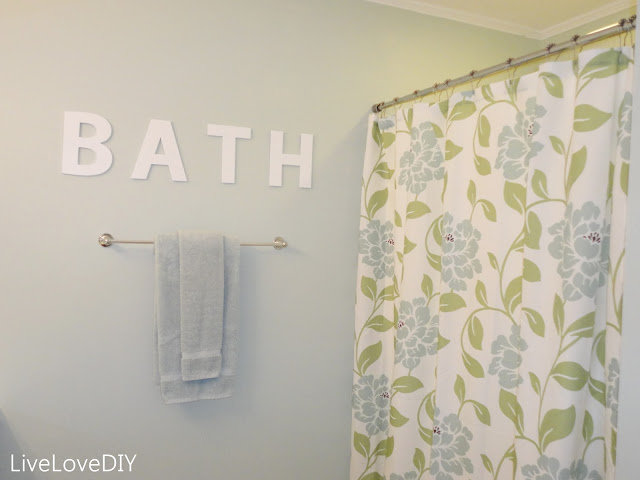
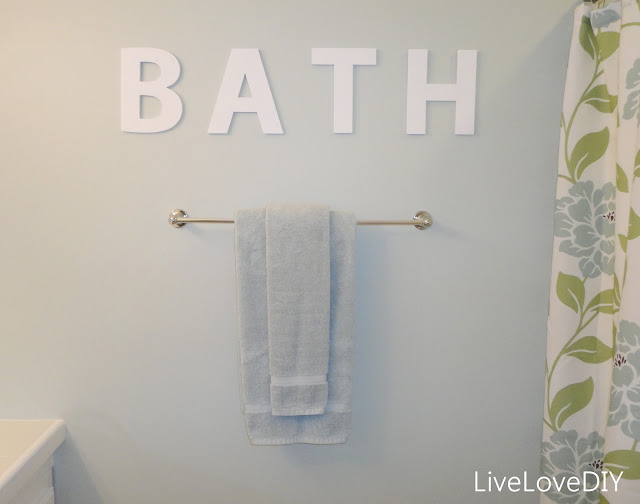
After painting stripes in the guest bath, I wanted to do something special here, too. So, I found some big cardboard letters at the craft store and spray painted them white. 

Easy DIY ideas for updating older bathrooms. So many great ideas including how to paint tile & grout, and how to frame in a mirror!

I stuck them to the wall with some wall hanging adhesive.

Easy DIY ideas for updating older bathrooms. So many great ideas including how to paint tile & grout, and how to frame in a mirror!

Now, onto the next part of this bathroom, the mirror.  In the guest bath, I removed the construction grade mirror and hung a framed mirror. However, in the master bathroom I ran into a problem. The mirror was attached to the wall with adhesive rather than screwed in like the other bath. Rather than deal with having it shatter into a million pieces, I decided to build a frame around it.

Here's the before pic. You can see that around the edges the mirror was discolored and looked awful.

Easy DIY ideas for updating older bathrooms. So many great ideas including how to paint tile & grout, and how to frame in a mirror!

So, the we went to Lowe's and picked out some cheap faux-wood trim. Faux wood was definitely the way to go for this because not only was it cheaper ($6 per 6ft piece), but the synthetic wood was also really lightweight and much easier to hang.

Here is the finished mirror, all framed in. After we glued the frame to the mirror, I caulked the gaps and painted the entire frame white.

Easy DIY ideas for updating older bathrooms. So many great ideas including how to paint tile & grout, and how to frame in a mirror!


I think it looks so much better than the old construction grade builder mirror.

Easy DIY ideas for updating older bathrooms. So many great ideas including how to paint tile & grout, and how to frame in a mirror! 

Oh, and my budget dried up before I could get a toilet paper holder thingy, so for now, the toilet paper has a bowl. 
Just keepin' it real.

Here's the view from the other way. 
You can see out into the bedroom.
(Take the bedroom tour here. Prepare to laugh.) 

Easy DIY ideas for updating older bathrooms. So many great ideas including how to paint tile & grout, and how to frame in a mirror!

And there ya have it: Our little blue master bathroom!
It's nothing special, but it's so much better than before. It feels totally refreshed and new, and it no longer makes me cringe when I walk in.
And that, my friends, is a success!

Thanks for letting me share my home with you!
I'm so glad you stopped by!

Easy DIY ideas for updating older bathrooms. So many great ideas including how to paint tile & grout, and how to frame in a mirror!


Follow my blog with
bloglovin' photo BlogLovin_zps5407d9e3.jpg
Follow my blog onFacebook or

or

Subscribe to LiveLoveDIY with email!
Enter your email address:

click map Facebook Pinterest Google+ Twitter Mail Subscribe

-->

July 18, 2012

Moroccan Stenciled Canvas Wall Art

Today I'm sharing my latest DIY art idea. It's a super easy and super affordable way to make wall art.


It took me all of 10 minutes to complete and it's one of my fave pieces of wall art yet!


All I did was use a stencil on a big canvas. And then I added a little texture using impasto and a pallet knife.


For paint colors, I used some leftover interior paint. The darker color is 'silver drop' by Behr and the lighter color is 'ultra pure white' by Behr. Both are in flat. 
I coated the entire canvas with a gloss finish.


I'm not sure where I'll put it yet, but I have a few ideas!

Follow my blog with
bloglovin' photo BlogLovin_zps5407d9e3.jpg
Follow my blog onFacebook or

or

Subscribe to LiveLoveDIY with email!
Enter your email address:


click map Facebook Pinterest Google+ Twitter Mail Subscribe

-->

July 17, 2012

Thrift Store Chair Makeover

Let's talk birthdays. For most girls, a birthday involves getting a snazzy new outfit or maybe a trip to the spa. But no, oh no, not me. I get chairs from thrift stores.

A new very old chair is like a little piece of heaven. 
And my momma knows this.
For my birthday, she gave me this.


In my head I could see how awesome it would be after a little work.

Here's what I ended up with.


So, here's what I did.
I took it outside, primed it, and then spray painted it white.
Then I took all of the fabric off the chair with a pair of scissors and laid the pieces out flat. 
I used the old pieces of fabric as my templates for the new fabric. Once I cut my new fabric to match each piece, I used a heavy duty staple gun and glue gun to secure the bottom piece, top piece, and back piece. 
As you can see below, the seat cushion is one big piece, just wrapped around the edges and stapled underneath. For the part around the legs, I cut the fabric close to the edge and tucked under and stapled. I knew I was going to use upholstery trim around all of the edges so I wasn't worried about any imperfections. The trim covers it up!

I did the same thing with the one big piece on the front of the backrest cushion. I just wrapped and stapled the fabric to the back. 


Then, I used my last piece as a back panel and just stapled and glued it over everything. Do this last so that it covers up where you stapled the front piece of the cushion on.
I also decided to use the upholstery trim along every single seam.
I've never done that before, but I love the way it turned out. It feels almost nautical! 


So what do you think? Not bad for $15, right?!


Follow my blog with
bloglovin' photo BlogLovin_zps5407d9e3.jpg
Follow my blog onFacebook or

or

Subscribe to LiveLoveDIY with email!
Enter your email address:


click map Facebook Pinterest Google+ Twitter Mail Subscribe

-->

July 16, 2012

How To Spray Paint A Chandelier

When I set out to redo our office, I knew I would need to replace the ugly outdated flushmount that was already installed. It was very 1970's and very brown. I couldn't afford to splurge on a $100-$300 chandelier, so instead I decided to find an old brass chandelier and update it myself.
Here's what I ended up with.


How to update brass chandeliers with spray paint & crystals | LiveLoveDIY


In the end, it cost me less than $20 total, and it looks fabulous in the office.


and a closeup:


Here's what I did.

I searched eBay and found an old brass chandelier for $10.
It arrived quickly, and I ended up with about 1 million pieces to assemble.

Here are the 1 million pieces I was referring to:


 I started by using my blue painters tape to cover up any parts of the chandelier that I didn't want spray painted. I covered the cord & electrical bits with a plastic bag (taped off at the top) and taped the part where you screw in the bulb (it was already white). 


 I used an old piece of scrap wood to set everything on outside so that I could spray paint it.


Then I sprayed the entire chandelier with two light coats of spray paint, allowing them to dry for about 30 minutes in between coats. Make sure you get every little nook & cranny, and flip all of the pieces over and get the underside once your first coat is dry. Since it is hanging up high, you see the underside more than you do the top.


I would recommend using a spray paint that has primer all ready in it so that you can eliminate having to do a whole separate coat of primer. I used Rustoleum White and it worked great.

Once the chandelier was dry, I hauled it back inside and began removing the painter's tape. (Sorry about that gorgeous nighttime quality photo!)


Once the tape was all off, the next step was to affix the crystals to the chandelier. I ordered my crystals off of eBay, too. I was able to get 6 crystal droplets and 1 yard of crystal chain for $7 total. I couldn't find it that cheap anywhere else.

 To attach them, you can use whatever you want, but I chose to use picture hanging wire. I simply cut a little piece of the wire, threaded it through the ends of the crystal chain, and fastened it around the chandelier arms.


 Attaching the crystal droplets was even easier because they came with little metal key rings attached to them. Once I had all of the crystals attached, She was ready to hang!

This is where Jesse comes into play, as I always delegate my chandelier hanging duties to him.  My participation after this point was to simply hand him this instruction sheet and say 'Help.'.


And now there's a pretty chandelier in the office and for less than $20!


Feel free to pin this post so you can find it next time!

How to update brass chandeliers with spray paint & crystals | LiveLoveDIY


Thanks so much for stopping by!


Follow my blog with
bloglovin' photo BlogLovin_zps5407d9e3.jpg
Follow my blog onFacebook or

or

Subscribe to LiveLoveDIY with email!
Enter your email address:


click map Facebook Pinterest Google+ Twitter Mail Subscribe

-->

Quick and Easy LiveLoveDIY Projects

Mod Podge Hangers Photo Wall Ideas Sequin Art Chalkboard Cabinets Gold Leaf Art Stacked Log Tutorial