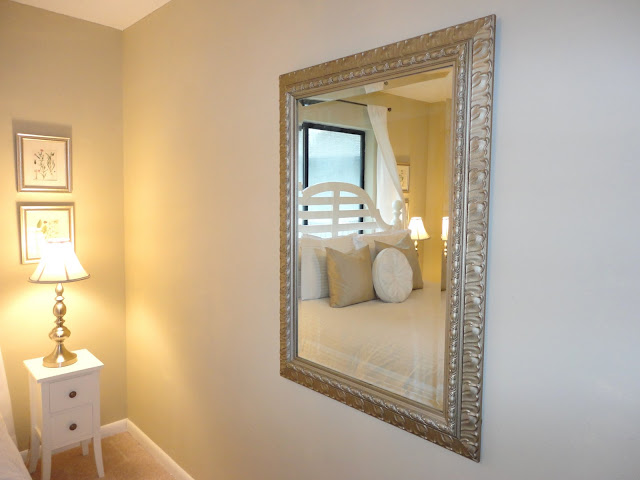
When we first found our 1970's fixer-upper, I fell in love with the master bedroom the minute I saw it. It was really ugly at first, but it didn't matter to me. I could see through the outdated colors and woodwork.
I saw potential.
This is the story of how I completely overhauled our bedroom on a really tiny budget. Let's begin with a look at the before picture.

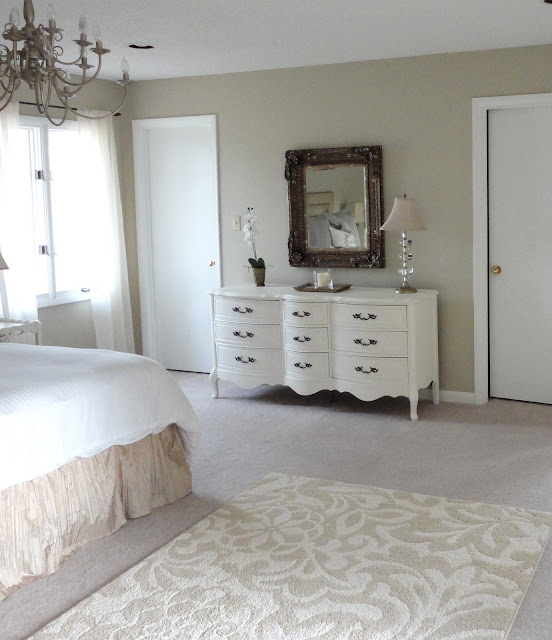
And here is the master bedroom today.
.JPG)
I did this entire room for under $500. The only thing I bought retail was the bedding and the rug. The rest came from a thrift store, garage sale, or was made by hand.
And I completely updated the entire room with paint.
This room had so much outdated wooden trim that I used to refer to it as the wooden dungeon. It just felt dark and depressing. I'm sure my awesome furniture didn't help matters much, either.

I painted all of the trim and doors in the room white, which made such a huge difference, and then I painted the walls with a warm beige.
See trim painting tutorial here and paint colors here.
I also rearranged the layout of the room. The bed was previously between the two closet doors (closet makeover seen here), but there wasn't really enough room. So, I moved the bed over to another wall, and put the dresser where the bed used to be.
.JPG)
There were tons of diy projects that went into the making of this room. One of my favorites is the headboard I made out of some plywood, foam, upholstery fabric, and nailhead trim.

For my first attempt at a DIY headboard, I think it turned out pretty cool.
See my tips on making a headboard here.
I trimmed the entire headboard with nailhead trim that I bought by the yard here (affiliate link). I absolutely love buying nailhead trim by the yard. It's so much easier than using individual nailheads for your trim. Rather than hammering in every single nail, you only have to hammer in 1 out of every 5. It's genius.

Other than the headboard, all of the furniture in the room came from a thrift store. It wasn't in my budget to get all new things, so I had to improvise. I found several pieces that had a great shape, and I painted them with my favorite shade of white paint.
See my top 10 furniture makeovers (along with mistakes to avoid when painting furniture) here.
My favorite item in the room is this french provincial dresser that I found for $50 at a thrift store.
I gave it a few coats of paint and accessorized it with a great mirror that I found at a local salvage store.
To truly appreciate this dresser, you have to see the before picture.
I included a few other thrifty finds like a gold mirrored tray, an orchid, and a brass and lucite lamp.
I decided to leave the hardware as it was, but I painted the insides of the drawers to make this dresser feel brand new. See more info about painting drawers here.

Another item I painted was this vanity. It was a thrift store find as well, and after a coat of paint, some gold stenciling, and a freshly upholstered stool, it feels brand new. I also added a mirror that I updated with some gold spray paint.
See my tried and true spray painting tips here.
I love the way the gold stencil makes this ordinary piece of furniture kinda special. It was really easy to do, and really takes the whole thing up a notch.
See the entire vanity makeover here.

The bedding and rug were the only new, store bought additions to the whole bedroom. I always to go 'new' with that sort of thing. The white striped duvet cover is from Target, the euro shams were from Marshall's, and the floral rug was from Home Depot.
I found an old brass chandelier at a thrift store. I needed something to replace the disgusting brown ceiling fan! It's a little too big, but still an improvement. I'm still searching for something better.
See what I ended up with here.
As you can see, the entrance to the room is flanked by gorgeous french doors. There is a whole other room on the other side that we have yet to figure out a purpose for.
There's also a large walk in closet that is behind those two doors by the white dresser, which you can see the full tour of here.
And see that little side room?
.JPG)
Here's what that room used to look like. I painted the entire room full of floor to ceiling wood paneling the same way I painted the trim. It wasn't fun, but I did it.
And that my friends is how I updated our master bedroom on a tiny budget!
Just remember, no matter how much or how little money you have, you can make your house special on a shoestring budget. Sometimes, it just means you have to wander into thrift stores, make your own stuff, and learn how to use a paint brush. I make a lot of decorating mistakes along the way, and am always learning as I go. I'm sure this room will go through so many more changes!
Don't forget to pin this post so you'll have this info when you need it!

To see all of the mistakes and changes that occurred in this room after this post, check out this post.
Follow my blog with

Follow my blog on or
or  or
or
-->


.JPG)


.JPG)
.JPG)


.JPG)


.JPG)


