LiveLoveDIY home home my story house tour projects top 10 contact How To Make Gold Leaf Art faux stacked log fireplace tutorial DIY Abstract Wall Art diy ampersand thumbtack art 10 budget decorating tips LiveLoveDIY Image Map

February 28, 2013

Master Bedroom Updates!

Hope everyone is having a great week so far! I've been busy all week making a few changes to our master bedroom. For those who follow my blog, you know that I've assembled this room almost entirely from thrift store finds or handmade items. Sometimes I get it right, and sometimes I get it wrong, but our bedroom continues to evolve and improve as time goes on. Today I have a few updates for you!

Budget Bedroom Decorating Ideas | LiveLoveDIY

You may have noticed that little striped bench peaking through in the above pics. For nearly a year now, I've been eyeballing this Ballard Designs Simone Bench. It comes in many different colors, but I've had my eye set on one pattern, and one pattern alone.


 However, at the price of $401, it did not fit into my $10 budget. 

So, I decided long ago to make my own. One day last week I saw this bench I had sitting in my bedroom.

Budget Bedroom Decorating Ideas | LiveLoveDIY

Hello, sir.

This was an old $5 piano bench I brought home from Goodwill. I originally painted it dark brown and put it near my hutch desk in the bedroom (last seen here). And so this week, I turned it into my very own version of the Ballard striped bench.

It cost me less than $5 to upholster it using some remnant fabric from Joann's. I finished it off with some silver nailheads and painted the legs white. 


Budget Bedroom Decorating Ideas | LiveLoveDIY


And since I'm no stranger to upholstering things 
(like my DIY dropcloth headboard) it took me less than an hour to completely upholster my little striped bench.

I've been looking for something to take this room up a notch, and I think this may have helped. I still need some color, but I'm still working on that!

Budget Bedroom Decorating Ideas | LiveLoveDIY

This room will forever be a work in progress, since I'm totally learning as I go along.

Budget Bedroom Decorating Ideas | LiveLoveDIY


One more update. Remember the thrift store desk turned vanity, paired with my thrift store chair (that I reupholstered with blue stripes)?

Budget Bedroom Decorating Ideas | LiveLoveDIY

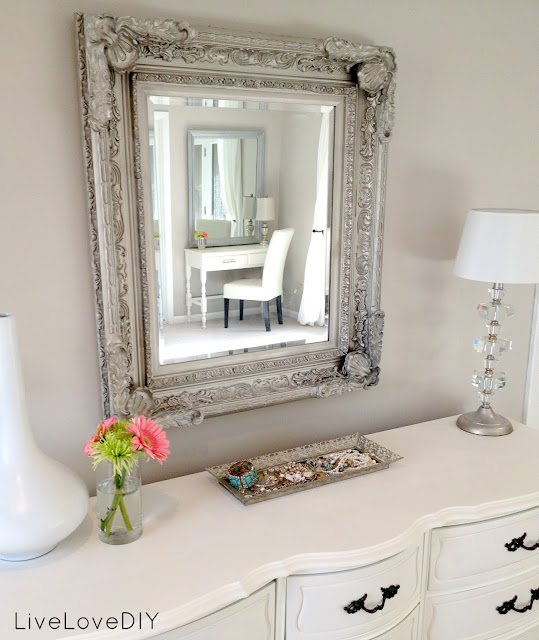
Well, I decided to change it. I painted the mirror silver, painted the vanity with my favorite paint, and got a new ivory leather chair from Marshalls.

Budget Bedroom Decorating Ideas | LiveLoveDIY

I think the whole things works better with this room now.

Budget Bedroom Decorating Ideas | LiveLoveDIY

Budget Bedroom Decorating Ideas | LiveLoveDIY

I added some fresh flowers around the room. While not a permanent addition, it always makes me happy to have some flowers around.

Budget Bedroom Decorating Ideas | LiveLoveDIY


Budget Bedroom Decorating Ideas | LiveLoveDIY

So that's all of the updates to the bedroom for now!
 Make sure and stop by tomorrow, when I'll be sharing step-by-step how I made my Ballard Designs knock-off bench from an old piano bench!

Also, before you go, just to remind you....the bedroom looked like this 3 years ago. :)


Budget Bedroom Decorating Ideas | LiveLoveDIY

see the full story about THAT here.


Follow my blog with
bloglovin' photo BlogLovin_zps5407d9e3.jpg
Follow my blog onFacebook or

or

Subscribe to LiveLoveDIY with email!
Enter your email address:


click map Facebook Pinterest Google+ Twitter Mail Subscribe

-->

February 25, 2013

How To Paint Tile Countertops

Hey ya'll! As promised during last week's kitchen reveal, today I'm finally sharing how I painted the tile countertop that's in part of our little kitchen. 


And I'm so excited.....this is a project that I've been wanting to do for a really long time! 
Real talk: I've been karate chopping my tile countertop every time I walk by it for nearly a year. Virginia hate countertop.

February 20, 2013

A DIY Blogger's Guide to Paint Products That Work!

When it comes to paint, I've tried tons of different products. In our recent kitchen makeover, I got to try out some products that were new to me, so today I thought I would share which ones ended up being my favorite.

A DIY Blogger's Guide to Paint Products That Work! Great info to read before you buy!


So, let's get started with the paint colors and the product breakdown.


In yesterday's post, I talked about how I painted my kitchen cabinets a pretty white. 


How To Paint a Kitchen: Paint Colors | LiveLoveDIY

Here's the info for my cabinet color:


White Kitchens: What color to paint kitchen cabinets | LiveLoveDIY


Since the insides of my cabinets looked like this when we moved in,


I decided to get creative, and I painted the insides of each door with  chalkboard paint (seen here).


For the chalkboard doors, I used chalkboard paint, which has quickly become one of my faves. You just paint it on pretty much any surface and you instantly have a chalkboard!

A DIY Blogger's Guide to Paint Products That Work! Great info to read before you buy!

I used the same chalkboard paint on my chalkboard accent wall in the corner of the kitchen.


I wanted to make a permanent menu on our chalkboard, so instead of regular chalk, I used a bistro chalk pen (Amazon Affiliate link).  It writes just like a pen. The only thing is that it doesn't erase all the way, so whatever you write stays there. I used it to write the Monday through Friday, and then I use regular chalk for the rest of the board. 


Let's talk chairs. I decided to make my white thrift store chairs look like metal industrial chairs.


 I used Rust-Oleum titanium silver, one of my favorite silver spray paints. I love the finish the paint creates and it's super durable.


I also used the titanium silver spray paint on this mirror. 
Tip: Use a small brush to paint black paint in the grooves of any ornate mirror and let dry. Then spray with the silver spray paint. After the spray paint is dry, go back in and add a little more black paint in a few areas. You'll be left with a really great dimensional finish.


Now, let's talk wall paint and trim paint. 


I've painted my entire 1970's house full of trim. 

See all of the before and afters AND a really easy tutorial here.
 When I paint my trim, I usually use Behr Ultra Pure White in a semi gloss finish.


Here's a picture of the look-through bar in my kitchen. You can see the white trim. I love the ultra-pure white because it has zero amounts of any other color. That way when you paint your walls, the color really pops against the pure white.


See how gorgeous the wall color looks against the trim? I love it. That's a brand new paint job in our kitchen, too. It's my new favorite greige paint, a perfect blend of beige and gray.

The kitchen used to be a warm beige, and after awhile it started to wear on me. Here is a picture of the original wallcolor right after I brushed some of the new paint color on. You can really see the difference when they're right next to each other.


The new paint color I used is called Behr Mineral.

A DIY Blogger's Guide to Paint Products That Work! Great info to read before you buy!

I've tried so many different beiges and grays, and this is handsdown my fave. 
I had it mixed in Glidden (just because it's cheaper). Here's a pic of the exact specifications. You can take the below info to any paint store, and they should be able to mix it for you there.


A DIY Blogger's Guide to Paint Products That Work! Great info to read before you buy!

Here's the next awesome product that I use. When I first shared it in this post, the questions came pouring in.
Basically, I have tile floors in my kitchen and all 3 bathrooms. The tile is in great condition, but the grout was disgusting. So, I did some research online and discovered that you could paint your grout. 
Not with just any old paint....you have to use grout paint.


I used Polyblend Grout renew and a toothbrush as an applicator. For more details you can go here.


This next product was a total gamechanger for me. I've been annoyed by the outdated tile on my bar area for nearly 3 years. It drove me nuts. 


It screamed 1980's every time I walked by it.
So, I painted it.


It's durable, beautiful, and looks like porcelain tile now. 


I love it.
You can see all the details about how I painted my tile in this post


So, that's all for today! Thanks so much for stopping by!


Follow my blog with
bloglovin' photo BlogLovin_zps5407d9e3.jpg
Follow my blog onFacebook or

or

Subscribe to LiveLoveDIY with email!
Enter your email address:


click map Facebook Pinterest Google+ Twitter Mail Subscribe

-->

Quick and Easy LiveLoveDIY Projects

Mod Podge Hangers Photo Wall Ideas Sequin Art Chalkboard Cabinets Gold Leaf Art Stacked Log Tutorial